With the Open Source Administration Tool ISPConfig you can manage all your important settings for your Webhosting like Website-Access & Databases per Browser.
Your Webhosting Packages from Medialekt are also managed with ISPConfig.
Create Website & Domain
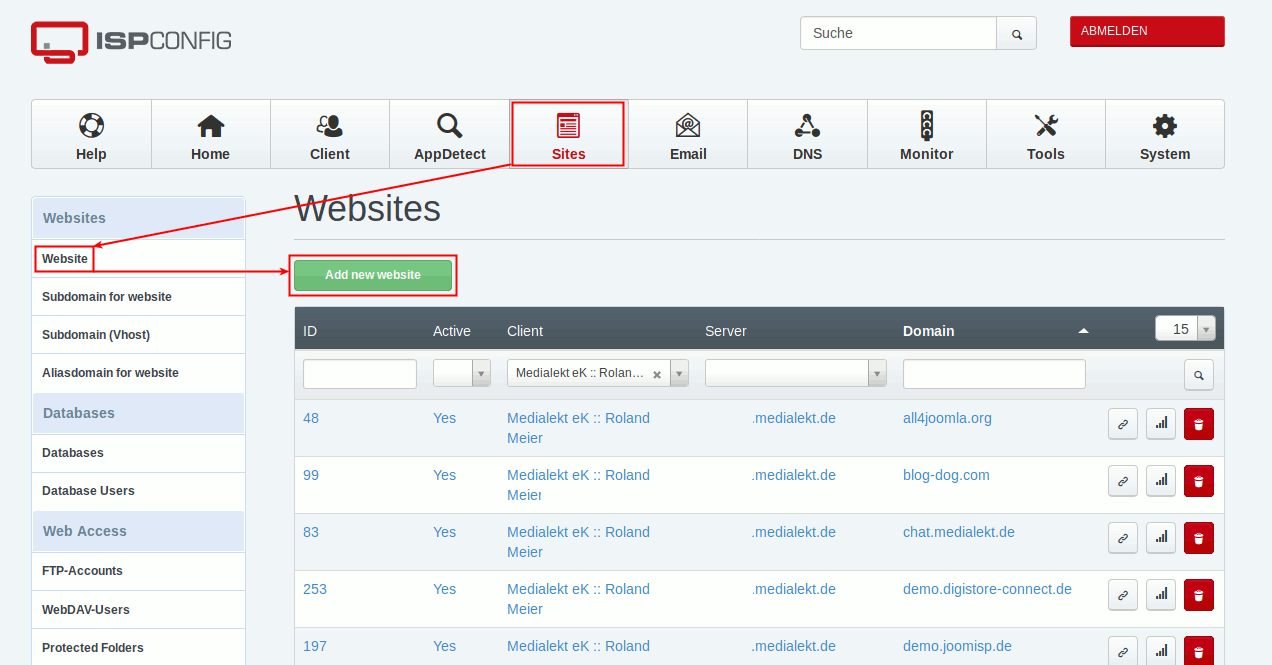
After login with your access data, go to Sites → Website → Add new Website:

Here you can find 6 Tabs which are described here in short:
- Domain
- Server
According your Webhoster you can select different Server. - Domain
Enter the Domain (without www.) connected from your Registrar to this Server. - Quota
You have an available Web-Quota. Split it between all your Websites so you did not exceed. - Transfer Quota
If your Webhoster limit your transfer, enter here your value. - Select the Options for your Hosting, on the Medialekt Server for example SuEXEC + Eigene Fehlerseiten are ok.
- Auto-Subdomain
Select www. if this is a independent Domain. If the site is already a Subdomain, choose None. - SSL
Activate SSL, if you want to set a certificate. - Let´s Encrypt SSL
If available you can generate automatically a Let´S Encrypt certifiacte. - PHP
Select the PHP-Mode. On Medialekt Server normally Fast-CGI or FPM is ok. - PHP Version
If you choosed Fast-CGI, you can set up from PHP 7.0.
- Server
- Redirect
On the Medialekt Server normally used values are:
- SEO Redirect
www.domain-tld => domain.tld
Decide only for one fixed variant. - Rewrite HTTP to HTTPS
Redirect all requests to encrypted HTTPS.
- SEO Redirect
- SSL
If you have a own certifiacte, enter it here. - Statistics
On the Medialekt Server you can operate Matomo instances, which provide significantly more information and are more comfortable to use.
But you can set here AWStats or Webalizer. - Backup
Choose your Backup options. We recommend:
- Backup Intervall: Daily
- Amount of Backups: min. 3
- Options
You only see this Tab if you have the permissions. As an Administrator you can set individual PHP.INI values or Apache Directives.
Save your setup and wait about 1 minute so the server can process your changes.
Create a FTP-User
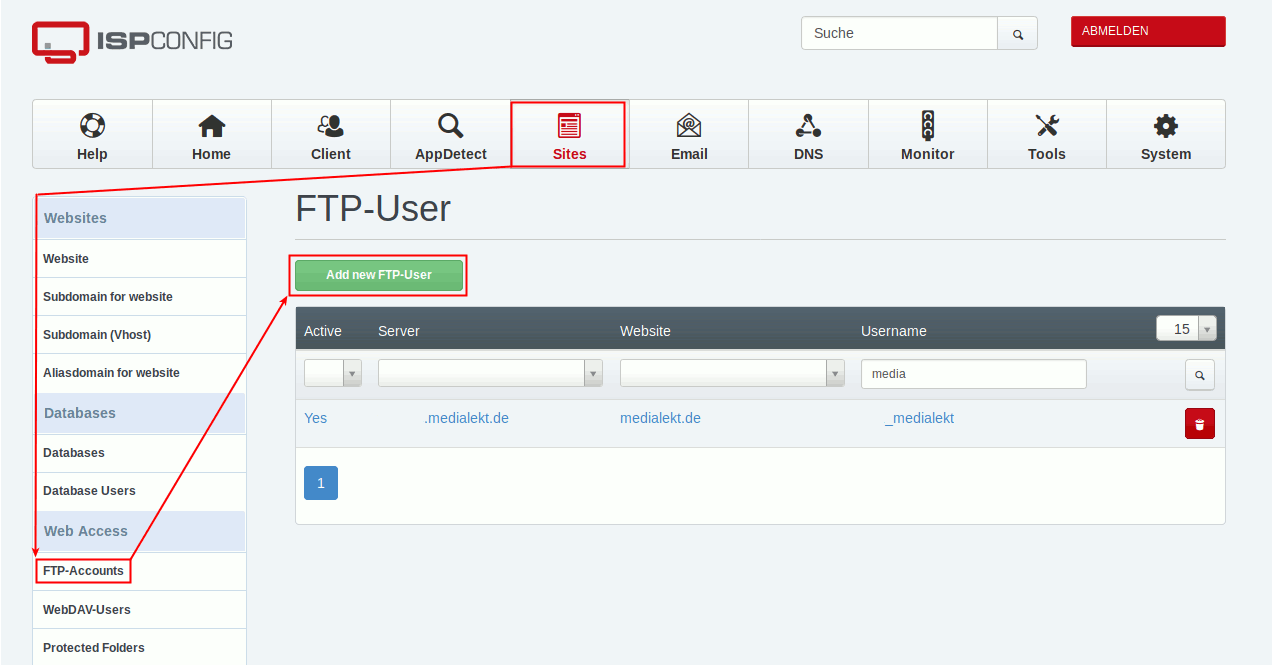
To create a new FTP-User, go to Sites → FTP-Accounts → Add new FTP-User:

Enter here for example follow fields:
- Domain
Select the Website/Domain for this FTP-Account from before. - Username
Enter a Username. It´s possible that your Hoster add a Prefix to avoid conflicts with other clients on the server. - Password
- Quota
If you wish, you can enter a quota.
Create a Database-User
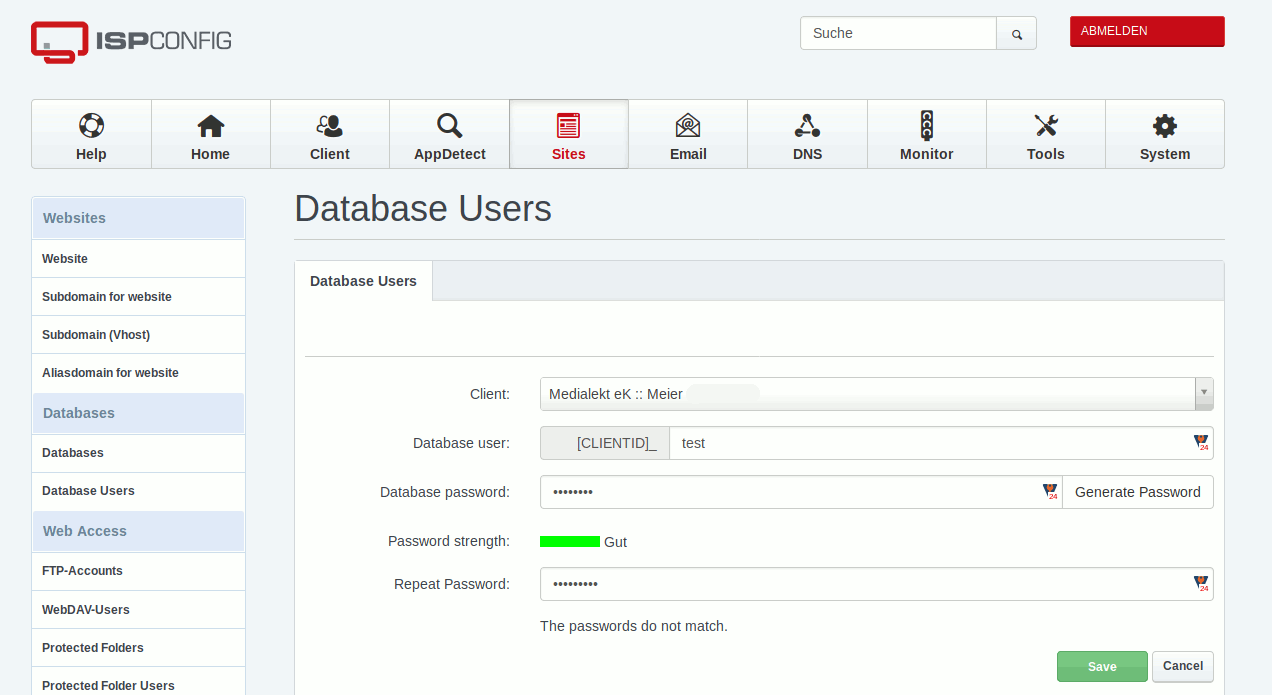
To create a new Database-User, go to Sites → Database Users → Add new Database User:

Enter for example following values:
- Database-User
Enter a Username. It´s possible that your Hoster add a Prefix to avoid conflicts with other clients on the server. - Database-Password
Create a Database and connect with User & Website
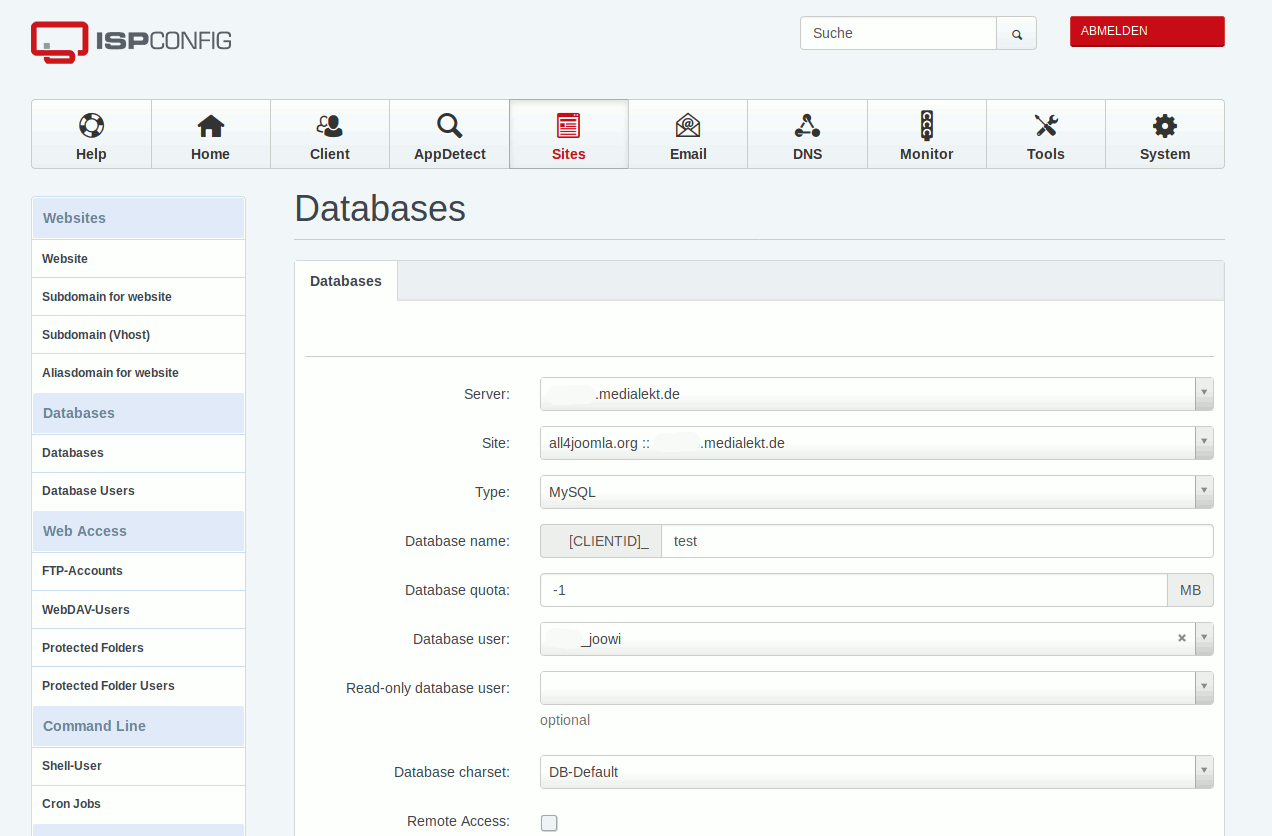
To create a new Database, got to Sites → Databases → Add new Database:

Enter following fields for example:
- Server
According your Webhoster you can select different Database-Server. - Webseite
Select the Website/Domain to connect this Database from before. - Database-Name
Enter a Database-Name. It´s possible that your Hoster add a Prefix to avoid conflicts with other clients on the server. - Database-User
Select the Database-User from before. - If required you can set optional permissions, Charset or Remote Access.
Now you should have all required Information and Accounts to install your own Website and possible Content Management Systems.


 JooWI Online ERP is easy, high flexible and optimized for your company.